Andrew and I have always enjoyed cooking together. When we first started dating, my mom assigned me dinner duty one night. Luckily, Andrew and I came across a recipe in a Better Homes and Gardens magazine that looked tastebud worthy. We decided that we would treat my family with this new dinner idea. It was so good that we ended up fixing it for his family as well.
Since then, we have enjoyed making Buffalo Chicken Pizza together, and this weekend, we perfected an already awesome recipe. Let me share...
Ingredients:
Pita Bread (Whole Wheat)
Chicken Tenderloins (Buffalo chicken tenders if wanting to fix it more quickly)
Celery
Bleu Cheese or Ranch salad dressing
Buffalo Sauce
Bleu Cheese Crumbles
Preparation:
After boiling (to leave the chicken wonderfully moist) and shredding the chicken, mix with buffalo sauce to taste. We used four chicken tenderloins (they were very small!) for our two pizzas.
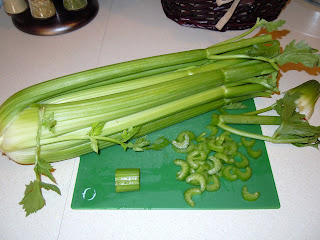
Thinly slice a stalk of celery. You'll probably need more if you're making more than two pizzas.
Lay pita bread in a single layer on a non-greased baking sheet.
Top with dressing of choice.
Assemble pizzas with as much chicken and celery as your tastebuds desire. For example, Andrew likes more meat... I like more dressing. These are built to taste!
Bake at 450 degrees for 10 minutes... or until dressing is bubbly and the pizzas are golden brown.
Garnish with bleu cheese crumbles and drizzle with extra buffalo sauce if your tastebuds insist!
Serve with an extra stalk of celery and enjoy!
These are extremely easy to make- and they are super fun to eat!
If you wish, you may use buffalo chicken tenders (Tyson makes them) in place of tenderloins. These come breaded and all you have to do is cook them as instructed on the packaging, cut them in half, and make the pizzas as instructed above. We chose to make ours with tenderloins for the first time for two reasons... it is cheaper to do it this way and it cuts down on calories to boil the chicken instead of eating it breaded. We honestly liked it much better and will continue making them this way!
Either way you go, this recipe won't disappoint!


Yum, Andrew need more buffalo chicken pizza!
ReplyDeleteCome home and I'll GLADLY make you one!!!!!
ReplyDelete